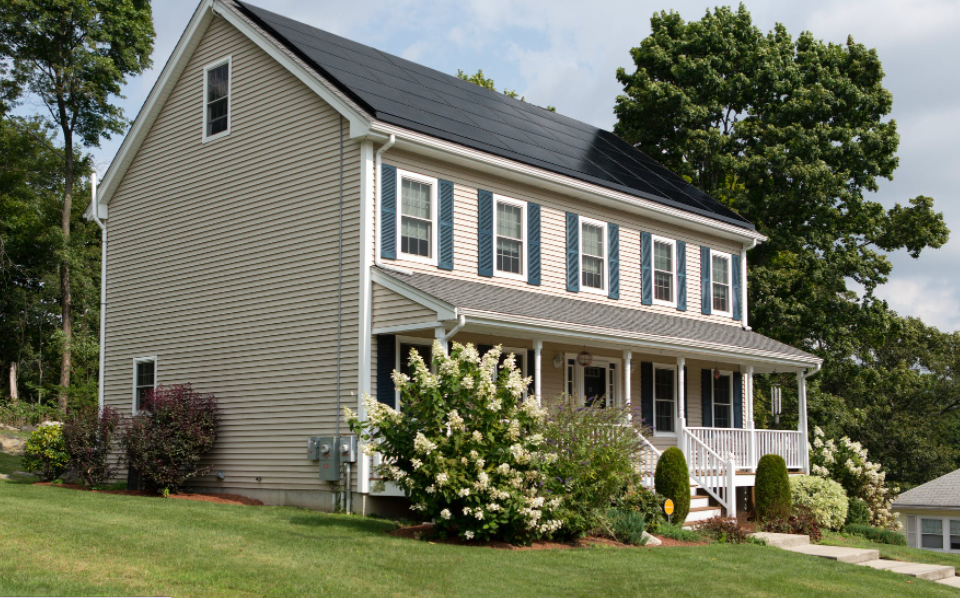
Vinyl siding arrives in a scope of styles, surfaces, and shadings including vertical and even boards and wood shake/shingle styles. The expense is low to direct averaging around $3 to $8 per square foot (in addition to work). The incredible thing about vinyl is that it is a low support material and can keep going up to 50 years.
2. Wood Siding
Wood siding is accessible in a wide assortment of styles, completions and surfaces yet requires an outside finish like color or paint. The expense is moderate to high averaging somewhere in the range of $3 to $14 per square foot introduced. Since wood requires a color or paint finish, it is inclined to issues from dampness if the house isn’t as expected ventilated.
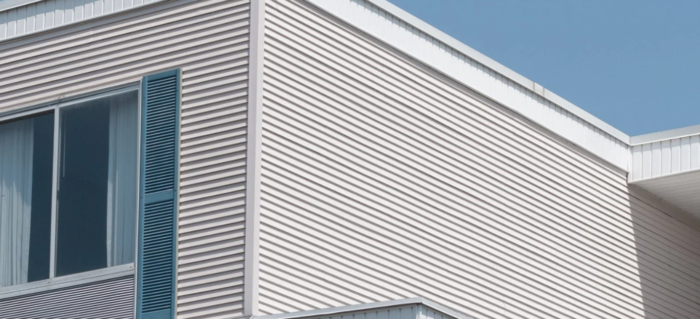
3. Metal Siding
Metal siding is likewise accessible in a wide scope of styles including boards, vertical strips and even shingles. You can find aluminum siding for about $3 to $6 per square foot and uncoated steel sells for about $4 to $8 per square foot. Steel and aluminum are both low support materials however might be inclined to imprinting.
4. Fiber Cement Siding
Fiber concrete siding looks basically the same as regular wood when introduced appropriately. It is amazingly sturdy however somewhat on the pricier side for siding. You can have fiber concrete siding introduced for about $10 per square foot.
This material is low upkeep and isn’t likely to decay or creepy crawly harm. It can keep going up to 50 years.
5. Protected Siding
Protected siding is one more sort of vinyl agreeing with a protecting layer produced using expanded polystyrene froth or EPS. The EPS gives the siding a nearer fit to your home and consequently holds air in better making your home more energy proficient. Numerous property holders report a 20% expansion in their energy effectiveness with protected siding.
Thanks to our friends at BGB Painting in Gilbert, Arizona for these siding tips.…
Welcome to our comprehensive guide on how to revamp your home without breaking the bank! If you’re ready to breathe new life into your living space but your budget is holding you back, fear not. We’ve compiled a treasure trove of budget-friendly decorating tips and tricks to help you achieve the home of your dreams without spending a fortune. Let’s dive in and explore how you can decorate on a dime!
Declutter and Organize
Let’s start with the basics – decluttering and organizing your space. Before you can begin any decorating project, it’s essential to clear out the clutter and create a clean canvas. Take the time to go through each room in your home, sorting through items and deciding what to keep, donate, or toss. Invest in storage solutions such as baskets, bins, and shelves to keep your essentials organized and out of sight. A clutter-free environment not only looks better but also makes your home feel more spacious and inviting.
Fresh Coat of Paint
One of the most cost-effective ways to transform your home is with a fresh coat of paint. Whether you’re looking to brighten up a room with a neutral color or make a bold statement with a vibrant hue, painting your walls can instantly revitalize your space. And the best part? It’s relatively inexpensive and something you can easily do yourself. Head to your local home improvement store, pick up a few gallons of paint, grab a roller and brush, and get ready to give your walls a makeover.
DIY Artwork
Who says you need to splurge on expensive artwork to adorn your walls? With a little creativity and some basic art supplies, you can create your own masterpieces at a fraction of the cost. Whether you’re a seasoned artist or a complete novice, there are endless possibilities for DIY artwork. Experiment with different mediums such as acrylics, watercolors, or mixed media, and let your imagination run wild. Not only will you save money, but you’ll also add a personal touch to your decor that can’t be bought in a store.
Thrift Store Finds
One person’s trash is another person’s treasure – and nowhere is this more true than at thrift stores and flea markets. These hidden gems are a treasure trove of budget-friendly home decor items, from furniture and accessories to unique vintage finds. Take some time to explore your local thrift shops and flea markets, and you’ll be amazed at what you can discover. With a little patience and a keen eye, you can score amazing pieces at a fraction of the cost of buying new.
Upcycle and Repurpose
Embrace your inner DIY enthusiast and give old items a new lease on life through upcycling and repurposing. Turn an old dresser into a stylish bathroom vanity, transform mason jars into trendy storage containers, or give outdated furniture a fresh coat of paint for a modern look. The possibilities are endless when you think outside the box and get creative with what you already have. Not only will you save money, but you’ll also reduce waste and add a unique touch to your decor.
Swap and Trade
Looking to freshen up your decor without spending a dime? Organize a swap party with friends or neighbors to exchange home decor items you no longer want for something new-to-you. It’s a fun and eco-friendly way to declutter your space and score some fabulous new pieces in the process. Plus, you’ll get the satisfaction of knowing that your unwanted items have found a new home, rather than ending up in a landfill.
DIY Window Treatments
Give your windows a makeover without breaking the bank by making your own window treatments. Whether you opt for simple curtains, roman shades, or decorative valances, there are plenty of budget-friendly DIY tutorials available online. Choose affordable fabrics and hardware to keep costs down while adding style and privacy to your space. With a little creativity and some basic sewing skills, you can create custom window treatments that are as stylish as they are affordable.
Accessorize with Plants
Bring the outdoors in and add a touch of freshness to your home with indoor plants. Not only do plants improve air quality and reduce stress, but they also act as natural decor elements that can liven up any room. Look for low-maintenance varieties such as succulents, pothos, or snake plants that thrive indoors with minimal care. Arrange them in stylish pots and planters to add a pop of greenery to your space and create a calming atmosphere.
Swap Hardware and Fixtures
Give your kitchen or bathroom a mini makeover by swapping out old hardware and fixtures for new ones. Replace dated cabinet knobs and drawer pulls with modern designs, upgrade faucets and showerheads for a fresh look, and switch out outdated light fixtures for stylish alternatives. These small changes can make a big difference in the overall aesthetic of your home without breaking the bank.
Create a Gallery Wall
Showcase your personality and style by creating a gallery wall filled with your favorite photos, artwork, and mementos. You don’t need expensive art pieces to create a stunning display – simply mix and match frames in different styles and sizes for an eclectic look. Experiment with different layouts until you find one that works for your space, then hang your pieces with confidence. Not only will a gallery wall add visual interest to your home, but it will also give you a chance to showcase your creativity and personality.
Rearrange Furniture
Sometimes all it takes to refresh a room is a simple rearrangement of furniture. Experiment with different layouts to maximize space and create better flow. Don’t be afraid to think outside the box and try unconventional arrangements – you might be surprised by how much it transforms the look and feel of your space.
DIY Storage
Maximize storage space in your home with DIY storage solutions. Whether you’re dealing with a small apartment or a large house, there are plenty of creative ways to keep clutter at bay and maintain a tidy and organized home. Build floating shelves, install pegboards for organizing tools and accessories, or repurpose old crates and baskets for stylish storage options that won’t break the bank.
With these budget-friendly home makeover ideas, you can give your space a fresh new look without breaking the bank. From simple DIY projects to thrifty shopping tips, there are plenty of ways to decorate on a dime and create a home you love. So roll up your sleeves, unleash your creativity, and get ready to transform your space into a stylish and inviting retreat – all without spending a fortune. Happy decorating!
Painting your home can be a cost-effective way to give it a fresh new look and enhance its overall appearance. While it may seem like a daunting task, with the right preparation and techniques, you can achieve professional-looking results. Here are some tips to help you paint your home like a pro:
Plan and Prepare: Before you start painting, create a detailed plan. Decide on the colors, finishes, and the areas you’ll be painting. Make a list of the materials you’ll need, such as paint, brushes, rollers, drop cloths, painter’s tape, and any necessary primers or sealers. Remove furniture or cover it with drop cloths to protect it from paint splatters. Clean the surfaces to be painted to ensure proper adhesion.
Repair and Prime: Inspect the surfaces for any cracks, holes, or imperfections. Fill them with spackle or putty and sand them smooth once dry. Prime any bare or repaired areas to create a uniform surface and improve paint adhesion. Primer also helps to block stains and ensure better color coverage.
Use High-Quality Tools and Materials: Invest in good-quality paint brushes, rollers, and other painting tools. High-quality brushes and rollers will apply paint more smoothly and evenly, resulting in a professional finish. Choose the appropriate brushes and rollers for the type of paint and surfaces you’re working with. Using high-quality paint will also make a noticeable difference in the final results, as it tends to have better coverage and durability.
Properly Prepare the Surface: Before painting, take the time to properly prepare the surface. Use painter’s tape to mask off areas you don’t want to paint, such as trim, windows, and baseboards. Ensure the tape is applied smoothly and press it firmly to prevent paint from bleeding underneath. Cover floors, furniture, and fixtures with drop cloths or plastic sheets to protect them from paint splatters and drips.
Apply Paint with Even Strokes: When applying paint, use smooth, even strokes to achieve a uniform finish. Start by cutting in the edges with a brush, painting along corners, edges, and trim. Then, use a roller to apply paint to larger areas, working in small sections at a time. Roll the paint onto the surface in overlapping vertical or horizontal strokes, slightly blending each new section with the previous one to avoid visible lines or streaks.
Maintain a Wet Edge: To avoid lap marks or visible brush strokes, maintain a wet edge while painting. This means working in continuous sections and not allowing the paint to dry completely before moving to the next section. Start each new stroke slightly overlapping the previous one to blend the paint seamlessly.
Apply Multiple Coats: In most cases, one coat of paint may not provide complete coverage. For a professional-looking finish, apply multiple thin coats of paint rather than one thick coat. Allow each coat to dry completely before applying the next. This will help achieve better color depth, consistency, and durability.
Clean Up and Finish: Once you have finished painting, carefully remove the painter’s tape before the paint dries completely. Clean your brushes and rollers promptly using the appropriate cleaning solutions for the type of paint you used. Properly store any leftover paint for future touch-ups.
By following these tips and taking your time with the painting process, you can achieve professional results and transform the look of your home. Remember to plan, prepare, use high-quality tools and materials, properly prepare the surface, apply paint with even strokes, maintain a wet edge, apply multiple coats, and clean up properly. With a little patience and attention to detail, you’ll be able to paint your home like a pro.
Each painting project worker comprehends that appropriate surface readiness is the way in to an enduring paint work. Be that as it may, surface readiness is additionally a region where numerous painters cut corners, says Joe Campbell, co-proprietor of Arizona Painting Company, one of the biggest artwork project workers in the state.
Careful covering
Great canvas experts comprehend that your house is one of the absolute most significant ventures you’ll at any point make, so they appropriately cover and close entryways, windows, machines, furniture, vehicles and individual things. Likewise, they’ll cautiously cover pavers and cement with drop fabrics too
Item twofold check
Many works of art experts are inclined toward brands. That is something worth being thankful for. Nonetheless, the brand doesn’t recount the whole story of the genuine paint that is being utilized on your home, Campbell makes sense of. At the point when the gauge indicates a specific paint type, ensure you coordinate that accurate paint with the covering that is conveyed to the place of work. Indeed, even the best brands offer cheap project worker grade lines that don’t keep going extremely lengthy.
Great geniuses don’t water down
Great canvas project workers, through experience, comprehend which paints are awesome available. They stay with a particular product offering since they know what it conveys in the method of life span and generally quality. With regards to applying the paint, they additionally keep the water out. A few project workers, for some, odd explanation, accept paint needs water added to it; it doesn’t, Campbell said. A decent ace might flush out a paint shower weapon with water, however the person in question is never adding water to a pail of paint.
Twofold investigation
Each great paint proficient will cheerfully request a walkthrough with the client before definite close down and installment. Nonetheless, a far superior paint master does an intensive investigation on his own work before the proprietor strolls the work.
There are six well known ground surface materials utilized in private homes, from exemplary hardwood to eco-accommodating cover. Also, there are a few other lesser-utilized sorts that accompany their own advantages. Utilize the underneath manual for pick which type or types are best for your space.
1. Hardwood Flooring
Wood flooring is any item made from lumber that is intended for use as deck, either underlying or stylish. Wood is a typical decision as a deck material and can come in different styles, tones, cuts, and species. Bamboo flooring is frequently viewed as a type of wood flooring, in spite of the fact that it is produced using a grass (bamboo) instead of a lumber
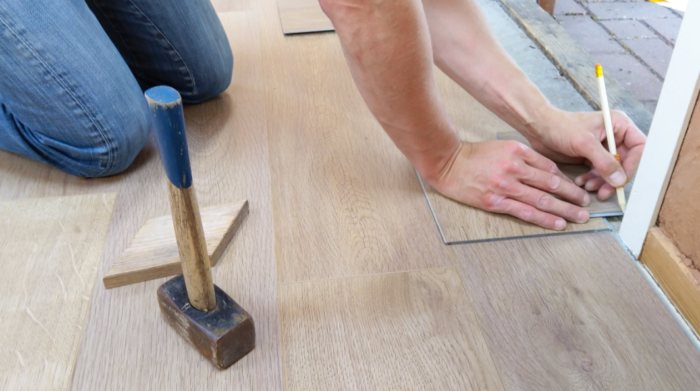
2. Overlay Flooring
Overlay flooring comes as boards or tiles. The edges and finishes are intended to snap together so there’s no nailing, making the establishment a decent DIY project. The overlay development gives the pieces steadiness and keeps creases from opening up during changes in stickiness. Lightweight, snap-together overlay flooring is introduced over a dainty froth pad underlayment. That makes it a decent contender for establishments over most existing decks — except for cover — wiping out the requirement for removal.
3. Vinyl Flooring
Vinyl flooring is an item made out of a few layers of various materials sandwiched together to frame a profoundly sturdy, pragmatic and reasonable floor covering. The two fundamental sorts of vinyl flooring are Luxury Vinyl Tiles (LVT) and vinyl roll. Both LVT and vinyl roll are produced using similar materials, notwithstanding, they’re built diversely to create various results. For instance, the board design is ideal to impersonate regular wood.
4. Ceramic Flooring
Fired and porcelain tile flooring are wonderful choices for high-traffic and dampness inclined regions in the home. At the point when you pick coated artistic ground surface tiles, you are getting the special reward of a defensive layer that sits on the material, which will make it impervious to water and stains. Coated tiles are additionally impervious to high mugginess conditions, something particularly gainful to homebuyers. These properties make coated earthenware tiles ideal for damp conditions, like washrooms and kitchens.
Drastically help the value of your home by making little, practical changes to your living space. You might be a mortgage holder hoping to sell your property at the most ideal cost, or possibly you’re a first-time property holder who doesn’t have the financial plan for a full-scale redesign yet. You might even be a mortgage holder who needs to make a couple of extraordinary changes to increase the value of your home.
With an arrangement, you can reasonably redesign your home and enjoy harmony of psyche simultaneously. Remember your financial plan and objectives as you make an arrangement for handling your redesign projects. Ask yourself these inquiries to assist with detailing your arrangement: Why are you remodeling? Would it be a good idea for me to sell my home or rebuild my home for myself? What redesigns should be finished?
Apply a Fresh Coach Paint
Paint makes the dividers in your home look pristine. Painting your dividers is simple, reasonable and hugely important. All you need is a couple of gallons of paint and a small bunch of rollers, tapes, brushes and drop materials.
Zero in on recovering dividers with old backdrop, unfortunate tones — like violet or dull brown — or blurred paint. You can likewise paint cupboards, drawers, furniture and different provisions that may require an invigorate. A great many people lean toward colors like beige, select shades of dim and surprisingly light blue!
Little Details Matter
The apparently inconsequential changes could significantly change the presence of your home. Make a rundown of modest ways of expanding your home estimation in the event that you intend to sell or a rundown of updates that you need to add your very own touch to your living space. Attempt to handle one redesign a month in the event that you have a restricted spending plan. Spot the handles of kitchen cupboards and entryways. Fix free wires and flawed fixtures. Update your ground surface.
Update Your Home’s Lightings
The motivation behind having lighting in your house is to make your living space more brilliant and simpler to see. Adding light to your home makes it look roomier by making more profundity to your rooms. Legitimate outside lighting likewise expands your home’s wellbeing and draws in expected homebuyers.
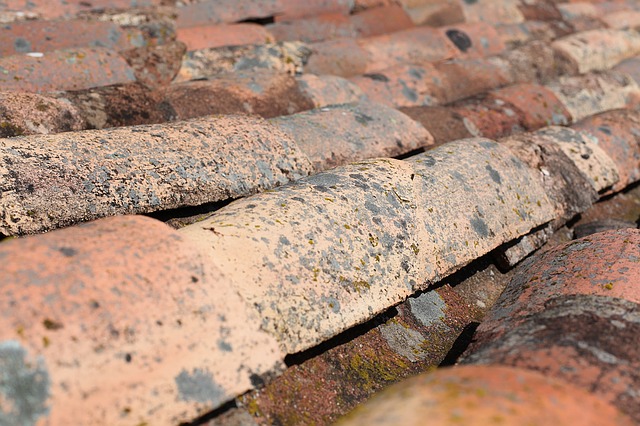
A roof’s primary function is to protect a home from the elements, but it also needs to perform this task with as little damage as possible. When a proper leak or structural damage is found, homeowners should contact professional roofers immediately. There are many materials that can be used for roofing repairs and each one has advantages and disadvantages.
The first step in determining the type of repair required is looking at the location of the leak. Small leaks can usually be fixed with sealant or flashing tape, but leaks need to be repaired promptly before they lead to outflow problems that need more expensive fixings. A qualified roofer will know which type of material is best suited for the repair and has access to several materials.
If a shingle is damaged, it can usually be replaced by removing the surrounding nails and carefully replacing the shingle. If there are multiple shingles that are damaged or need replacement, professional roofers are necessary for the job. There are many different types of asphalt roofs that use individual pieces instead of shingles. Many times when these materials are damaged they need to be removed quickly in order to prevent water damage below them. Aluminum-backed material often does not allow traditional metal flashing techniques because it can corrode in contact with aluminum in addition to melting in high temperatures. A different technique must be used in order to install this type of roofing properly. Newer products like PVC-backed material allow traditional roofing techniques to be used.
Metal roofs require the most skill of any type of roof because there are many different types that can corrode or need replacement quickly. Steel is generally covered with a rubberized material like EPDM, but this does not mean it cannot be damaged by hail or heavy snow. Other metal options include copper and aluminum, which do not have a protective covering and rely on a good installation to prevent damage from moisture in addition to use in high temperatures. A qualified roofer will know which products work best for each area depending on the weather conditions and needs of each home.
Asphalt shingles are the most commonly used roofing material. They are available in many different colors and types to match any home. Asphalt is naturally made of rubber, which makes it elastic but vulnerable to certain problems that can cause leaks or damage despite proper installation. The asphalt used for roofs must be flexible because there are gaps where each piece overlaps another one on top of it down the length of a roof. If the material becomes stiff due to age it is more likely to crack during changes in temperature or heavy weight on top of it, causing leakage or damage underneath them. A professional will ensure that all materials meet building codes so they do not become damaged or fall off prematurely as well as assessing weather conditions such as hail and heavy snow before installation.